photo IOTFhometab_zps80d0beb6.jpg  photo IOTFaboutmetab_zps0dbfaa58.jpg  photo IOTFcontactmetab_zps6aae20f7.jpg  photo IOTFsitearchivetab_zpsdc170097.jpg  photo IOTFthingsimintotab_zpsf69fa047.jpg
Showing posts with label Drugstore Finds. Show all posts

Friday, November 22, 2013

Sonia Kashuk Undetectable Cream Bronzer Review and Swatch


     If you read my Top Ten e.l.f. Products post, then you probably know I really like cream bronzer.  For starters, cream bronzer tends to hold up better than a powder bronzer (kind of how most cream/liquid foundation hold up better than powder foundation).  You can also SET cream bronzer with a powder as you would your foundation (this is why it's a good option for oily skin) or you can use it alone and it isn't drying like a powder (making great for dry skin too).  What does this mean to me? Long-wearing contour/color.  The only problem? Most brands don't have a cream bronzer.  Until more recently, Chanel's Soleil Tan de Chanel was one of the only nice cream bronzer's out there.  It comes with a lot of product, but also a fairly high price tag.  Now, quite a few brands are coming out with some options in cream bronzers/contours.  But Sonia Kashuk's can be found at Target!  It retails for $10.99 and comes in two shades: Warm Tan and Rich Bronze.  I went with the darker shade, Rich Bronze, so that I could use it as a contour color.


     It's called "Undetectable" for good reason - the product blends very easily!  The formula smoothes right on creates a soft finish.  I love the way this product feels on my skin; it's a cream but is so lightweight it feels as though you didn't apply anything!  Because it's so smooth and airy-light it's extremely easy to blend in making it perfect for contouring during the day (but can also be built up for night).  Undetectable. 

My Tips:
♥ If you have oily skin: lightly apply it and then set it with your normal face powder.
♥ If you have dry skin: don't set with a powder if you don't normally.  
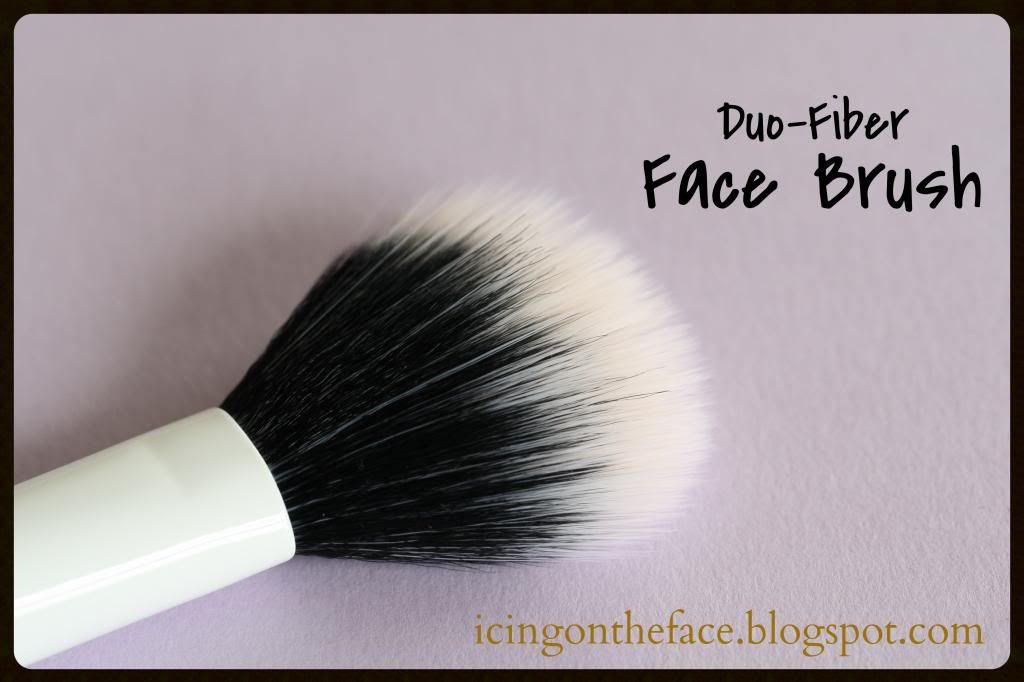
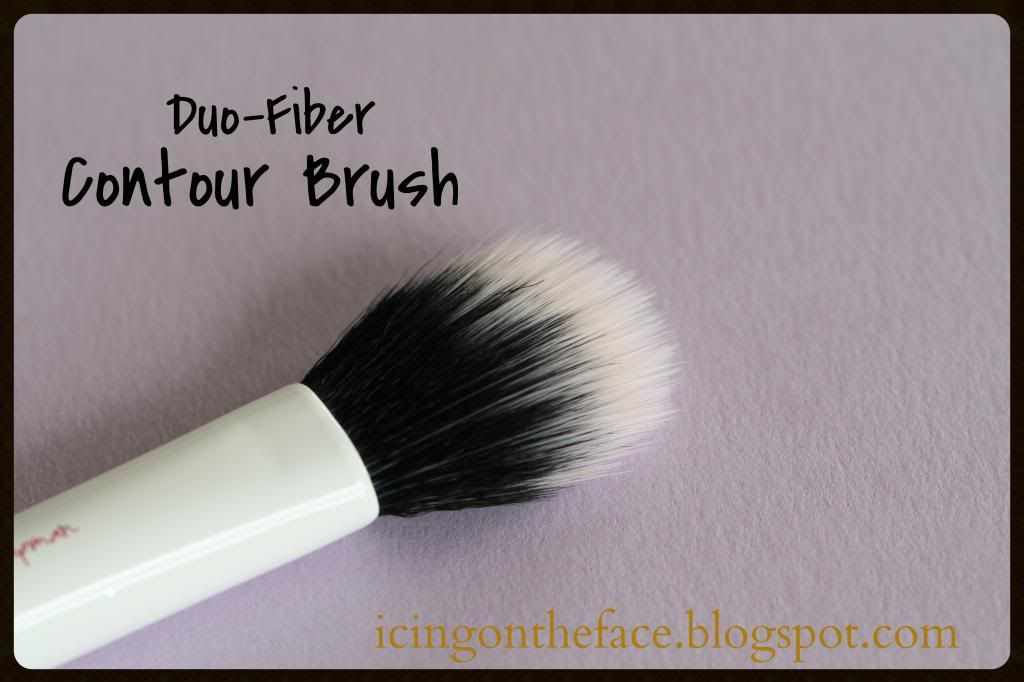
♥ Use either a stippling brush or synthetic-bristled buffing brush to apply. Blend in all the edges well.

Sonia Kashuk Undetectale Cream Bronzer in "Rich Bronze"


     I'm really enjoying this bronzer right now!  The Rich Bronze color is perfect to use as a contour - it doesn't come off as orange or overly warm as most bronzers do, there is no shimmer, and it's blend-ability makes it perfect! 


Do you have a favorite contour or bronzer for winter-time?

post signature

Wednesday, November 13, 2013

Maybelline Dark Circle Eraser Brightener Review and Swatch


     The Maybelline Instant Age Rewind Dark Circle Eraser Concealer has been raved about by quite a few bloggers - I've been using it for a couple years now!  Recently I decided to try out the "Brightener" version of this concealer.  You'll find it in the same display, but the shade will be Brightener.  It's a little pink compared to the others, but entirely amazing.
     First off, some people like to use yellow concealer to correct their dark circles under their eyes - but if you don't have very warm-toned skin this won't look very natural for you.  The pink tone really brightens the area and covers up the blue/purple/black pigment that we can get under our eyes.  No, it doesn't look like you smudged pink marker under there.  It looks naturally bright.
     One of the best things about this product is that while it is very pigmented, it is very LIGHT.  This makes it easy to use the actual concealer on top of it if you need to - it's thin enough that you can layer these products without making your under eyes look heavily caked with concealer.  On a daily basis I actually find that this brightener alone has enough coverage for my under eyes!  This provides such a natural AWAKE look.  I think it can shave years as well as built up stress off of your face.

My Tips:

♥ Lightly pat the applicator around the inner corner of your eye extending down over any dark areas underneath the eye.  Avoid dragging towards the outer part of the eye because this can actually bring out the look of bags (It highlights and brings out the uneven and slightly puffy part some people may have - keep it towards the inner corner!).
♥ Use your ring finger to gently pat in the concealer and blend it.  Using your finger will warm up the concealer allowing it to smoothly blend into the skin. Also, the ring finger is the weakest and gentlest to use on the delicate under eye skin.
♥ If you need a little extra coverage, let the brightener set and then apply a concealer over the top in the same way.  Keep each layer light and thin.
♥ If you want to set your under eyes with powder only use very finely-milled powder that will not make this area look cakey or dry.
♥ Always invest in a good eye cream - even if you have no bags or circles under your eyes dehydration can make you look tired or aged.


     I've been loving this awesome under eye brightener. Best part is it's easily accessible at the drugstore for around $8.  Let me know what you think!

post signature

Wednesday, November 6, 2013

Maybelline Shine-Free Stick Foundation Review and Swatch


     Shine-free foundation in an easy-to-use stick?  You know this was on my Wish List as soon as it came out (seriously, click on "wish list")!  Apparently Maybelline Shine-Free Stick Foundation was on everyone else's too because every time I was at the store I could never find the right shade.  They were either sold out or had been opened and pawed upon.  No thank you.  When Ulta finally replenished they're stock, I grabbed it!  I've been using this foundation for days when I just want to even my complexion out, but don't want to spend a whole lot of time on it.  Now that I have been using it for about a month (and STILL haven't done a review on it) let me give you the full break-down of this foundation. (and how you can prevent it from breaking down on your skin!)

Coverage: I would say Maybelline Shine-Free Foundation has medium coverage.  It's definitely not full but it isn't light either.  I think it's perfect for everyday wear.

Staying Power: I found that this foundation could be broken up by oil very easily.  It has this very weird balance - it keeps you from LOOKING oily, but still suffers wear from oil as any non-oil-controlling foundation would.  Weird; extremely weird.  But after trying a few different things I found that there are ways to really get the shine-free no-fading longevity out of this foundation.  For starters, it controls oil better when you DON'T use a primer.  Odd, I know.  Whatever "shine-free" stuff is in the center of this foundation does not work over the top of a primer.  Also, the way I apply it changes not only the finish, but the staying power.  A wet brush or beautyblender are the best methods. Controls oil great once you figure it out!

Finish: Applying with my fingers makes the coverage and finish a little uneven.  If I use a foundation brush the "shine-free" formula can actually be over drying (yes, even on an oily-skinned girl like myself).  If I wet my brush - perfect!  I've been using the Real Techniques Expert Face Brush (of stinkin' course, right?).  When I apply it this way, I get a great coverage that dries down to feel just like skin (not heavy or cakey), looks natural, keeps oil away, and is so quick and easy to apply.

My Tips:

♥ No primer
♥ Run your brush under the tap for a second and wring out the excess with a towel.  
♥ Swipe the foundation on the major plains of your face and use the damp brush to blend it out. The moisture makes the foundation go on so smooth and flawlessly!
♥ Wait until the foundation has dried and only use a small amount of powder to set it.


     Let me know if you have any favorite foundations or even BB creams that are nice for everyday wear for us oily-skinned girls!
post signature

Wednesday, October 23, 2013

Real Techniques Blush Brush Review

     Alright! Finally reviewing the last Real Techniques Brush I picked up last month - the Blush Brush! When I first looked at the collection, I didn't think this was going to be one of the brushes I would choose, but after a little research on all of them I thought that this one would make the most sense in my collection.  Which turned out to be an awesome choice!  
     
     Like always, if you haven't checked out my review of the Real Techniques Core Collection, click the link and AT LEAST read the first half because I talk about the ENTIRE Real Techniques line in that post.

     Anyway!  Upon first glance of this brush I thought that it WAS a powder brush - and when I read "blush brush" I was like "Did somebody stick this in the wrong box?! What's going on here . . . "  So I was really interested to try this brush out.  I was slightly convinced it wouldn't work well for me because of the size - I tend to prefer smaller, angled blush brushes because of the size and shape of my cheeks.  I love this thing!  The taklon bristles are perfectly cut to a soft dome shape on top - and it applies blush incredibly.  Without hardly any effort, you get blush perfectly concentrated in the center with a very soft focus effect fading out - WITHOUT A LOT OF BLENDING.  The brush practically does it for you! Seriously, seriously, more and more amazed with Real Techniques all the time.  I almost feel like I'm not putting in any effort into applying my make up anymore; these brushes are becoming the artist (not sure if that's good or bad)!  I just can't get over how in a couple swipes this brush makes blush look NATURAL - no harsh lines, a nice oval, gently fading out in all directions.  You would think the size takes away from the precision, but it doesn't at all! It is cut perfectly.  Perfection in every sense of the word. 

     The blush brush is also extremely versatile (are you tired of hearing me say that about Real Techniques brushes, yet?)  I've used this as an all-over powder brush and it applies powder so softly and naturally and it's so light and soft it FEELS great on the face.  You can also use it for applying subtle all-over bronzer, highlighter, and just about anything!  If I were traveling and needed to pack lightly, this would definitely be a multi-tasking brush I would use. I think all of the choices for that trip would probably be Real Techniques. So what?!
post signature

Reviews of Other Real Techniques Brushes:

Core Collection
Duo Fiber Limited Edition Collection
Expert Face Brush

Monday, October 21, 2013

Real Techniques Expert Face Brush Review


     I've got more Real Techniques Brushes to review! The Real Techniques Brush Line by Samantha Chapman were on sale at Ulta last month and after trying out the Core Collection I decided I needed to go back and take full advantage of the sale.  I knew I had to get the Expert Face Brush because so many people have had such good things to say about it - and they're all true! This is a really amazing brush.  
     Again, if you haven't seen my Core Collection Review, definitely do so because I review the entire line as a whole - which is very impressive.

     The back of the box describes the Expert Face Brush as "ultra firm and broad for application and blending of cream or liquid foundation" - which is all true but doesn't do the brush justice.  This brush is perfect because it is firm and a little broad, but the bristles are slightly tapered - making foundation a breeze.  It has the perfect amount of "give" and the tapering makes it goof-proof - you just have to whip this thing around your face and next thing you know you're looking perfect.  This brush makes things so quick and easy!

     When I'm working with liquid products I find that the Expert Face Brush blends everything in seamlessly, quickly, and insanely easily.  It tends to give medium coverage with first application, but it's just as quick to build up more coverage - and you won't have a "cake face" because it layers and blends so smoothly.  When I'm in a hurry I like to use a cream foundation and the Expert Face Brush will blend it out much quicker than anything else, giving light natural looking coverage.  If I'm wanting my cream product to be more full coverage I will use the brush wet - yes, I run the brush under water and squeeze the excess out really well!  This works so perfectly because the cream products glide on the face with more coverage but still maintain a natural finish - creating a seriously airbrushed effect!  I haven't used it wet with a liquid foundation yet, but I'm willing to bet that it will make the already wonderful application THAT much better! As I have found with all of the Real Techniques brushes, this is extremely versatile.  The Taklon bristles makes it able to use with liquids, creams, and powders.  If you want full coverage out of your powder foundation - try this brush!  If you want a heavy and defined contour with liquid/powder/cream - try this brush! 
     This is by far my favorite brush from Real Techniques and I think everyone should try this one out!  The versatility and overall performance of this brush makes it a necessity for any make up brush collection.  Let me know if you've used this brush or if you have other favorites from Real Techniques! Expect a review of the Blush brush next!
post signature

Reviews of Other Real Techniques Brushes:

Core Collection
Duo Fiber Limited Edition Collection
Blush Brush

Monday, October 14, 2013

Real Techniques Duo Fiber Limited Edition Collection Review

     I said that I would be reviewing the Real Techniques Duo Fiber Collection soon and it's high time I got that done!  If you haven't seen my review of the Real Techniques Core Collection then definitely click on the link and be sure to read the first half because I talk about the Real Techniques line as a whole - which is an INCREDIBLE line of affordable, quality make up brushes by Samantha Chapman (if you weren't aware). Go! Read that first.
     Duo-Fiber Face Brush: This brush was featured this in my last September Favorites post!  I've been loving using this with my loose powder because it picks up the perfect amount of product - other powder brushes pick up WAY too much when you're using a loose powder.  This brush is absolutely perfect for a light dusting of any powder product.  But like most Duo-Fiber brushes it works with cream, liquid, or powder.
     Duo-Fiber Contour Brush: The contour brush in this collection is very versatile for me.  I love the size of it and the barrel is pinched at the end giving it an oval shape - along with the tapering of the fibers make it perfect for a precise but light contour, subtle highlighting, or perfectly blended blush! I've been using it with powder and even cream products.
     Duo-Fiber Eye Brush: I also featured this brush in my September Favorites because it has made my eye looks effortless. It takes all of the work out of blending!  I find that it isn't great for applying powder eyeshadow because it can create a lot of fall out, but it is the most amazing brush for blending out the edges of eyeshadow you've already placed on the lid. Also great at blending cream shadow!
     The Real Techniques Duo Fiber Collection is Limited Edition and I'm not sure how much longer it will be out - but they definitely make a great addition to any brush collection.  I've been using all 3 of these brushes on a daily basis - love them!  I think these would be great travel brushes, especially the face and contour brushes because they could nearly do all of your face make up on their own.  Continually impressed by Real Techniques.
post signature

Reviews of Other Real Techniques Brushes:

Core Collection
Expert Face Brush
Blush Brush

Monday, September 9, 2013

Drugstore VS. High-End: What's Worth the Splurge?


     Money. Let's talk it. Even if you're someone making a six figure salary, we all like to save money where we can (or should). When it comes to beauty products, I obviously indulge myself. Since I tend to buy a multitude of products, it's really helpful to know where I can get a bang for my buck. Those of you who aren't HOBBYISTS in make up certainly have even more reason to try and save in the make up department.  I know many people who have never bought a high-end beauty product in their life! Is that wrong? No. But would you believe me if I told you that you weren't getting the most out of your money by buying exclusively at the drugstore? Probably not, so let me explain. First of all, I am a drugstore ENTHUSIAST! (So don't for one second think I'm pushing all high-end products.) I LOVE finding amazing things at the drugstore and a lot of my favorite products are from there.  But in some cases, buying higher-end products is more efficient because the quality allows you to use less of the product and sometimes causes less problems for your skin. If I buy one product costing 3x more, but works so well I use 6x less in one application, aren't I saving money? Yeah! That product is going to last for quite some time. But, the initial cost is high and that is what makes us turn and run back to our well-ventured drugstore.
      Now, there's also those people out there who believe you have to buy ALL high-end ALL the time in order to find quality. Untrue. So freakin' untrue. Over the years, I've discovered what is actually worth purchasing for that expensive price tag, as well as what areas the drugstore delivers just as much quality. 

My General Rules:

  1. Things that are placed directly on my skin (foundation, primer, concealer) I like to use high-end. Better ingredients, less breakouts, less problems, and less products to fix those problems.
  2. Products that are meant for color (blush, eye shadow) I tend to use high-end because better pigmentation allows me to use very little of the product and it usually has a better texture on the skin.
  3. Skin care is unique to each individual, but VERY important - takes a lot of figuring out for yourself personally.
     Other products, like mascara especially, there isn't a huge difference in quality and you use up in the same amount of time. Now that the drugstore is really stepping up on quality I find a lot of eyeliners, lipsticks, and eye shadows are comparable to high-end. (Wet n Wild Eye Shadow is some of the cheapest you will find at the drugstore, but also the absolute closest quality to high-end eye shadow.)
     So here's the categories of make up and where I tend to go for them (Drugstore vs. High-End). Is this a definitive guide? No. There's some real gems in every category at the drugstore that I use myself, but generally speaking this is what I stick to:


     For me, it's all about what actually gives me quality and amount for the price point I'm paying. This blurs the lines between what's truly expensive and what's reasonable. It's not just all Walgreens or Macy's.
Let me know in the comments if you have any more questions or shoot me an email!
Loving a little bit of both worlds,                                      
post signature

Monday, August 26, 2013

L'oreal Lash Boosting Serum Review


Plush and healthy lashes. We all want 'em; how do we get them? Can a little bottle of serum really give you that long feathery flutter you've been envious of? I've always wondered. 
The drugstore brand L'oreal began carrying their Double Extend Lash Boosting Serum a couple years back. Those of us who thought special treatments like that only came with a department store price tag or prescription were probably ecstatic. I was at first, until I saw that it was priced around $12.59. Yeah, that's super cheap compared to the $60-$250 you would be spending for most other "treatments". But it all seemed too good to be true to me. And I could get a lot more at the drugstore for 12 bucks if that product was a fluke. Finally seeing it on sale one day I decided to take the plunge. 
I've used it for a few months now, and my eyelashes are halfway to my forehead. Just kidding; but they're really healthy and a wee bit longer.
I used this serum at night regularly for about 4 months. It creates this weird coating on your lashes that can ball up after its been on for awhile, so I don't recommend wearing it underneath mascara because it may end up all over your face. It has this weird silicone-y feel to it and when it's dry in the morning you can pull a strand off - and it comes off rubbery and elastic-y. Weird. But whatever grows them lashes, right?
I think the most important thing that this serum does is prevent breaking. And it doesn't take a few months to see the results; just a few weeks and you will see the difference. Because my lashes weren't breaking they all seemed to be able to get to the same length. When I would put mascara on, it would be more uniform and not create that little jagged clump at the tip no matter what formula I used. Pretty cool.  It made my lashes really hydrated, protected, and healthy. 
While I think the L'oreal Lash Boosting Serum is nice, I don't think it provides crazy dramatic results. It definitely makes you more conscious of your lash health, which could be cause for improvement. But you could probably get away with using a little concoction of vaseline and gentle care for those lashes and end up with the same results. There can also be a little bit of irritation if you get the product too close to your actual eye; but that's kind of expected with these kinds of products. It wasn't too bad. I will definitely finish using the product as I like what it does, but I may not repurchase it.
Lash Love,                          
post signature

Monday, August 19, 2013

L'oreal Magic Skin Beautifier BB Cream


I think everyone under the sun has tried or been wanting to jump on the BB cream bandwagon. Since I reviewed Dr. Jart's Premium Beauty Balm earlier in the week, I thought I would give a review on one of the few BB creams that is oily-skin-friendly. L'oreal's Magic Skin Beautifier BB Cream is not quite like a typical Asian BB cream, but that is partly why I like it so much. First of all, it's thin; not thick and creamy like Dr. Jart. On days that I'm feeling more oily and want my skin to feel extremely light - this is perfect! It feels so thin, dries almost completely matte, and has good coverage at the same time. While it doesn't feel like it has quite the same amount of benefits for my skin as the Dr. Jart Premium Beauty Balm, it does have vitamin C & E for antioxidants. Is it better for your skin than a typical foundation? Yes. Does it have as much skin benefits as original asian bb creams? Not really. But I like it more for it's ease of use, simplicity, and efficiency.
Coverage: It's of course not full coverage, but it has at least medium coverage which is awesome for a BB cream or tinted moisturizer. Evens out my skin tone really well!
Staying Power: It stays on SO well! For a lighter product it has the best staying power I've ever come across (which usually is NEVER a characteristic for lighter products). It feels like nothing is there, but somehow it still remains at the end of the day! I think it's superb oil control has a lot to do with it's staying power.
Finish: Matte! No, not unnaturally-cakey-matte; just matte. I've never found a liquid product to be so thin and still provide a mattified finish. Love that!


I love the L'oreal Magic Skin Beautifier so much because it is extremely quick and easy and I get coverage as well as smoothing without caking on the products; no need for a primer! It is one of those "comes-out-white-and-then-changes" kind of products, so applying it with your fingers is the best way to go; this warms up the product and makes it go on smoother as well. So simple and quick! 
Luckily, this one comes in 4 shades: Fair, Light, Medium, and Deep. While it is a more expensive drugstore item, coming in at around $11.00, I find that after much use I've barely made a dent in the product; a little goes a long way!

Cupcakes and oil-controlled skin,                                     
post signature 

Wednesday, July 24, 2013

Banana Boat Summer Color Self-Tanning Lotion in Deep Dark Color Review


Let's just all be straight up - most of us have used self-tanners or do on a regular basis! I'll tell you right now that my golden, bronzey glow is 98% FAKE. (It's probably not that drastic, but I am still pretty pale during the summer because I don't find time to do a whole lot of outdoor summer fun things regularly!)
ONE, I don't want skin cancer and TWO: I don't have time for all the slathering things on, laying out for an hour every day all before showering. THREE: I don't wanna be blinding people with my legs when I do want to step outside.

Self-tanning is just the easiest solution. Let's not argue.

I first purchased Banana Boat's Summer Color Self-Tanning Lotion in Deep Dark Color because I had heard it was the best drugstore self-tanner. (I had been using Jergen's Express but the new 3-day thing made me want to try something else.)  When I first used this, I was VERY upset. I like to think that I am pretty good at applying self-tanner. I exfoliate, moisturize, watch out for my knees and bends and elbows and all that, and I rub it in REAL good. So why this self-tanner turned out streakypatchy, and orangey was beyond me. I had a wedding coming up that I was going to be photographing and was not about to wear pants to an outdoor wedding in June. No stinkin' way.  I could either take a chance and spend more money on something else that may fail me, or just work with it.  So I tried it out again.

I discovered I was just TOO GOOD at applying self-tanner. Yeah, you heard me, too good. Banana Boat Summer Color has a formula that is used to taking care of itself; it doesn't want you doing all the work! (My boyfriend should take notes!) I over-blended the lotion until the color guide balled up on my skin. Now that I've figured out how it works, I love it!


Here's what I do:


1. Exfoliate - use a scrubbie sponge, exfoliating body wash, sugar scrub, whatever you want.
2. Get the shaving out of the way - don't think oh, I'll just shave tomorrow after I put it on... just save product and time and do it before!
3. Apply a lotion or barrier to dry areas (your knees, elbows, wrists, knuckles, bends of your legs and arms, all those places).
4. Smooth it on quickly and evenly. Don't worry about blending the heck out of it for 10 minutes, as I usually do with self-tanners. If the color guide looks good, you're good! (the color that shows when you put it on)
5. Wash your hands (if you're not using a mit or something else) after every section. Finish your legs - wash 'em! Finish your arms - wash 'em!
6. Let it dry - I usually apply this right after getting out of the shower and let it set while I dry my hair and put make up on. While it is not the fastest at drying, it is completely dry within an hour. But you are fine to put clothes on after 10-15 minutes.
7. Keep up with it - I apply about twice a week. But if you don't want to keep applying make sure you use some exfoliation to keep the patchiness away as it fades. I've found it fades rather nicely, but not if you find yourself with dry skin.


Banana Boat Summer Color claims that it is a self adjusting color for a natural-looking and streak free tan. I definitely agree with this since I don't have to blend the crap out of this product, it makes for an extremely quick application. (No more setting aside special time just to make sure my self-tanner gets put on correctly.) It creates a very bronzed and brown color when you use it right and works with my skin tone (cool and neutral undertones; also have heard it works well for warm undertones.) It also leaves my skin feeling smooth and supple; beyond just hydration (It has a lot of good things for your skin it). Made self-tanning affordable AND easy!

Just Remember!

If the color guide looks good, you're good!!!


                                          Happy Bronzing,                             
post signature