


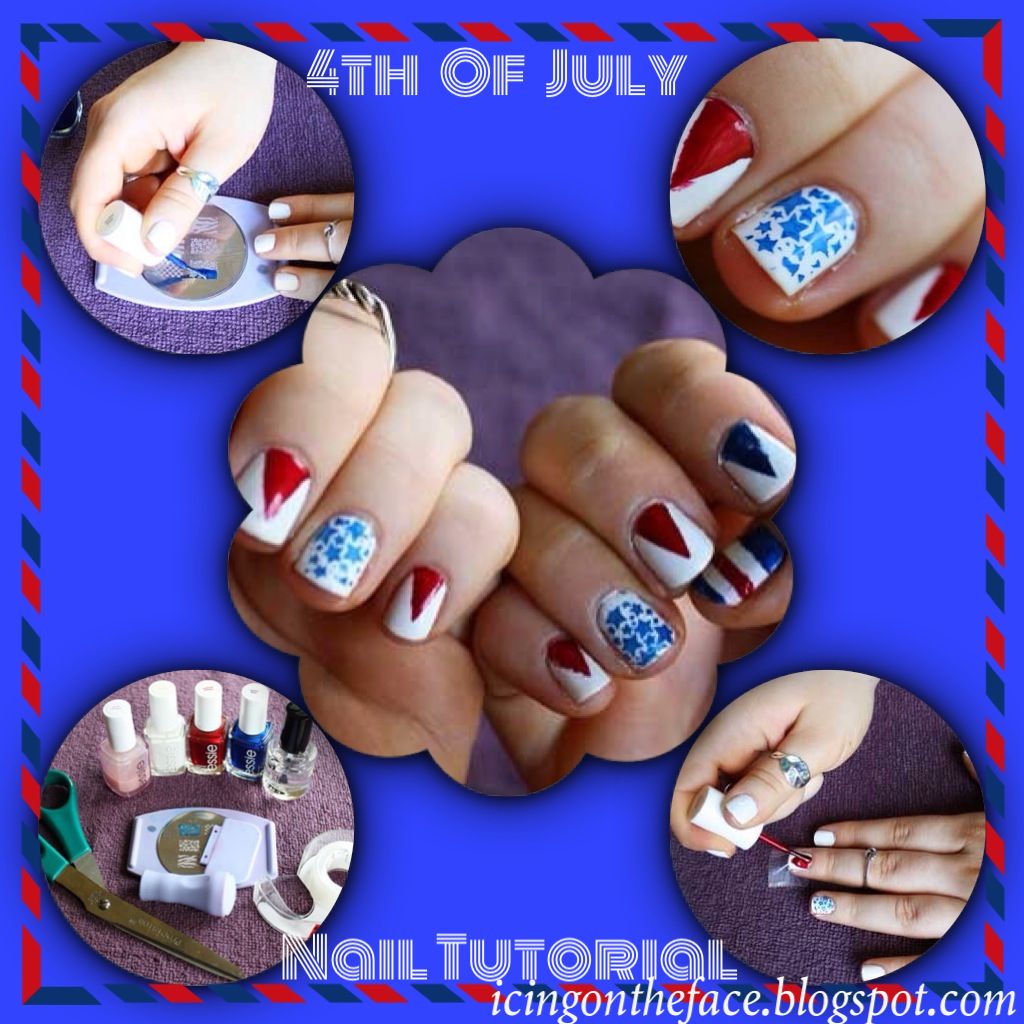

Here I've got (left to right): Essie Grow Stronger Base Coat, Essie Blanc, Essie Scarlett O'hara, Essie Aruba Blue and Seche Vite Dry Fast Top Coat on the end.
♥ If you don't have this, no worries! I only used it on one nail! ♥
On To The Tutorial:

1. Paint 'em all white! I used two coats for opacity.

2. Next I stamped a star pattern onto my ring fingers using my blue (Essie: Aruba Blue)
{{I can do a review/tutorial on this little gadget if anyone is interested; let me know!}}

3. On to the triangles! Get a piece of tape and stick it on the back of your hand. Leave it there. Wear it around, paint it, show it off. Just kidding; stick it there once and remove to take away a bit of the adhesive so that it doesn't pull off your white polish. You're going to need 6 of these for all of your other fingers. (Excluding ring fingers and thumbs)

4. Cut a triangle into the bottom of the tape in a size that will fit your corresponding nail.

5. Place the tape on your nail with the bottom edges lining up against your cuticle. I painted my middle fingers and pinkies red (Essie: Scarlett O'Hara) and my pointers blue. Paint it! After only 5 seconds peel the tape off quickly and firmly.

6. Thumbs! Cut two small strips of tape and place them just a little bit apart on your thumb horizontally. (Underneath the tape will be the white stripes.) Paint two sections blue and the middle one red. Remove the tape just like before.

7. BANG! (oooh, ahhh) Paint your fast drying top coat over all of them and these are sure to spark up a conversation this 4th of July (sizzle up some interest, ignite a flame, go out with a bang, sparkle someone's curiousity, dazzle your audience, blow up your ego . . . That was bad.)
Happy 4th of July!
No comments :
Post a Comment
THANK YOU! I appreciate every single comment I receive and expect a reply as soon as I'm able! <3